Contact Form for Static Sites Using Cloudflare Workers and Airtable
Static sites have no backend to process form submissions, making contact forms more difficult than on traditional server-rendered websites. This article builds a spam-protected contact form using a static HTML form, a Cloudflare Worker to process submissions, and Airtable to store messages and send e-mail notifications. For a low-traffic website, the solution fits within the free tier for both Cloudflare and Airtable.
Spam Protection
This implementation combines several independent techniques (defense-in-depth) rather than relying on a single filter.
- JavaScript submission blocks many simple bots that only submit HTML forms.
- Honeypot field catches automated tools that complete hidden fields.
- Referer validation rejects requests that do not originate from the expected page. Although this header can be spoofed in some circumstances, it adds an inexpensive filtering layer alongside the other checks.
- Nonce ensures the request includes a valid token so the Worker can detect tampering.
- Minimum submission time rejects the nonce if the form is submitted less than 5 seconds after the token was issued, which is unrealistically fast for a human.
- Maximum submission time rejects the nonce if more than an hour has passed since it was issued, limiting how long a token stays valid.
- Multiple submission prevention disables repeated submissions from the browser after a successful send.
While each technique can be bypassed individually, together they substantially reduce unwanted automated submissions while requiring very little infrastructure and no end-user friction (for example, CAPTCHA).
Instructions
Step 1: Create Contact Form
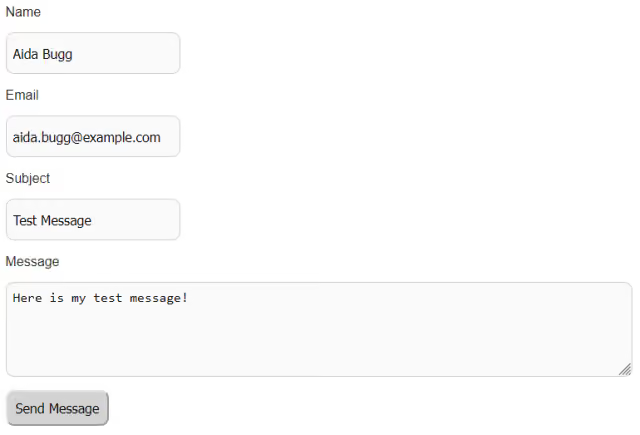
Start by building a basic HTML form with the following fields (all required): Name, Email, Subject, and Message.
Add honeypot and nonce fields, which can both be hidden with CSS.
The nonce field is populated automatically by JavaScript once when the page loads. The nonce (“number used once”) is an HMAC-signed cryptographic token generated by the Cloudflare Worker that helps verify the request originated from the website’s own form. Because the token is signed and includes a timestamp, the Worker can reject requests that contain invalid, tampered, or expired values without maintaining any server-side session state, and it can later measure how long the visitor took to fill out and submit the form.
For simplicity, no styling is applied to the form.
<form id="contactForm" aria-label="Contact form">
  <label for="name">Name</label>
  <input type="text" id="name" name="name" placeholder="" value="" required>
  <label for="email">Email</label>
  <input type="email" id="email" name="email" placeholder="" value="" required>
  <label for="subject">Subject</label>
  <input type="text" id="subject" name="subject" placeholder="" value="" required>
  <label for="message">Message</label>
  <textarea id="message" name="message" placeholder="" required></textarea>
  <div class="visually-hidden">
    <label for="nonce">Nonce</label>
    <input type="text" id="nonce" name="nonce" placeholder="" value="">
    <label for="honeypot">Do Not Use</label>
    <textarea id="honeypot" name="honeypot"></textarea>
  </div>
  <button id="submit-button" type="submit">Send Message</button>
</form>
<div id="response" role="status"></div>
The <form> element does not include action or method attributes. Instead, use JavaScript to:
- Block many spambots that cannot process JavaScript.
- Submit the form without reloading the page.
- Prevent multiple submissions.
When the page loads, JavaScript requests a fresh nonce before the form can be submitted.
let isSubmitted = false;

document.addEventListener('DOMContentLoaded', async function () {
  const nonceResponse = await fetch('/contact/nonce/');
  const nonce = await nonceResponse.text();
  document.getElementById('nonce').value = nonce;

  document.getElementById('contactForm').addEventListener('submit', async (e) => {
    e.preventDefault();

    if (!isSubmitted) {
      isSubmitted = true;
      document.getElementById('submit-button').disabled = true;
      document.getElementById('submit-button').classList.add('disabled');
      document.getElementById('response').textContent = '';

      const formData = new FormData(document.getElementById('contactForm'));

      try {
        const response = await fetch('/contact/submit/', {
          method: 'POST',
          body: formData,
        });

        if (!response.ok) {
          throw new Error(response.status);
        }

        const responseText = await response.text();
        document.getElementById('response').textContent = responseText;
      } catch (error) {
        document.getElementById('response').textContent = `An error (${error.message}) occurred while submitting the form.`;
        isSubmitted = false;
        document.getElementById('submit-button').disabled = false;
        document.getElementById('submit-button').classList.remove('disabled');
      }
    }

    return;
  });

  return;
});
Step 2: Set Up Airtable (Workspace, Base, Table, and API Keys)
Use Airtable to collect form data and send e-mail notifications. Airtable serves as both a lightweight database and an automation platform capable of sending notification e-mails without requiring additional infrastructure.
- Sign in or create an Airtable account.
- Create a new workspace (for example,
Cloudflare Workers).
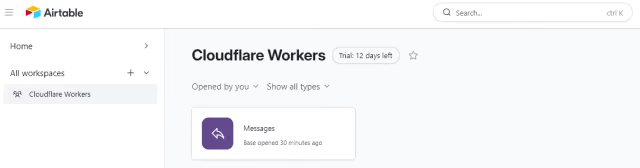
- Add a base named
Messages, and create a table also calledMessages.
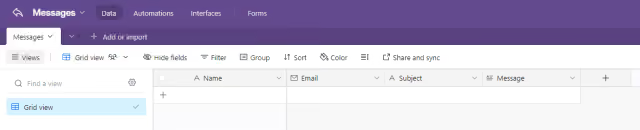
- Add these fields to the table:
Name(Single line text).Email(Email).Subject(Single line text).Message(Long text).IP(Single line text).Duration(Single line text).
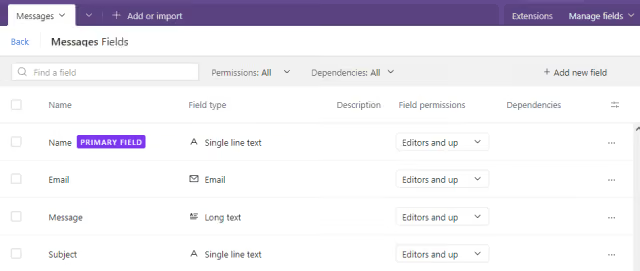
- Click the
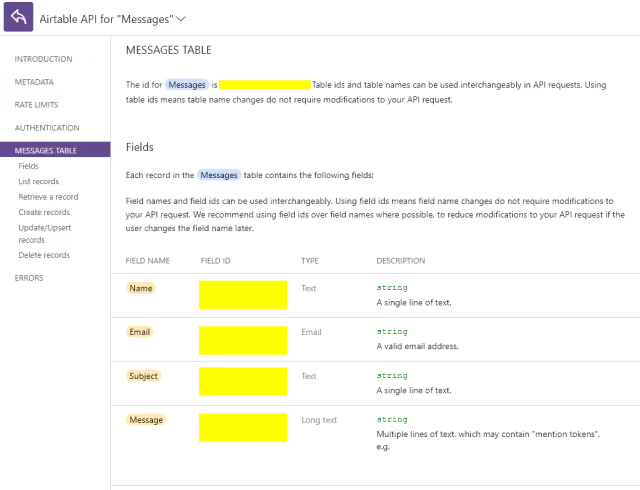
Helpbutton and openAPI documentation. In theIntroductionsection, note theIDfor theMessagesbase. This will be referred to asAIRTABLE_BASE_IDin a later step.
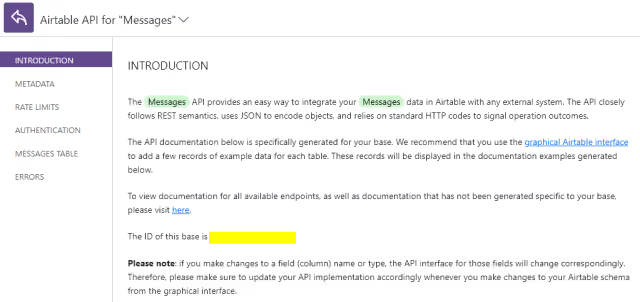
- In the
MESSAGES TABLEsection, note theIDfor theMessagestable. This will be referred to asAIRTABLE_TABLE_IDin a later step.
- Go to the
Personal access tokenspage andCreate new token. Name the token and add the scopedata.records:writewith access to the appropriate base. Click theCreate tokenbutton and note theTOKEN ID. This will be referred to asAIRTABLE_ACCESS_TOKENin a later step.

- Optional but recommended: Return to the
Messagesbase and clickAutomations. Create an automation to send a notification e-mail to a verified e-mail address each time a new entry is created in theMessagestable.
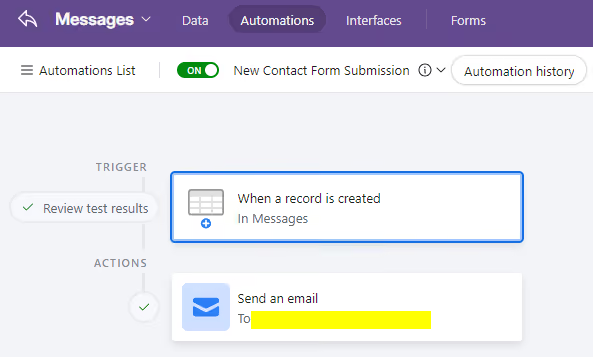
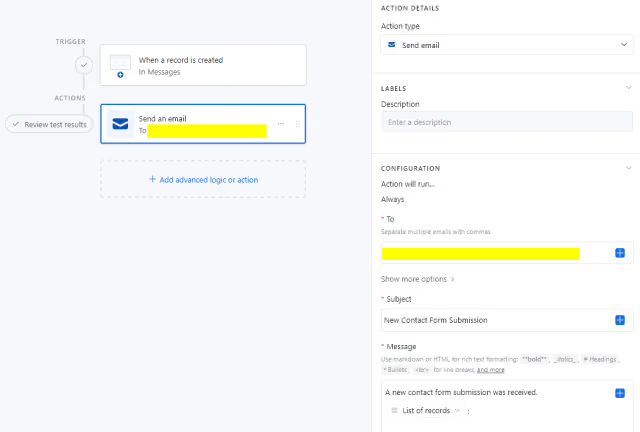
In the Send an email action, configure the notification to include the preferred subject line and fields from the Messages table as well as automation timing.
Step 3: Create a Cloudflare Worker
Now, create the backend service that connects the HTML form to Airtable.
- Log in to Cloudflare.
- Click
Computeand go toWorkers & Pagesand click theCreatebutton. - Click the
Create applicationbutton and selectStart with Hello World!. - Rename the project to something more meaningful and click the
Deploybutton. - On the dashboard, click the
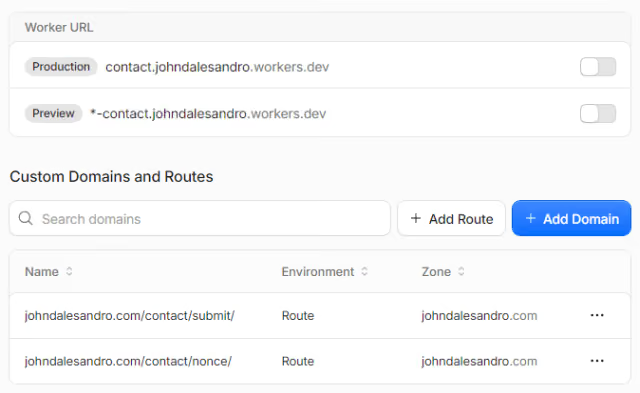
Domainstab to configureCustom Domains and Routes.
Disable workers.dev and Preview URLs routes.
Define two custom routes (non-wildcard) specific to the website:
- One matching the nonce endpoint (for example,
/contact/nonce/). - One matching the submission endpoint (for example,
/contact/submit/).
- From the
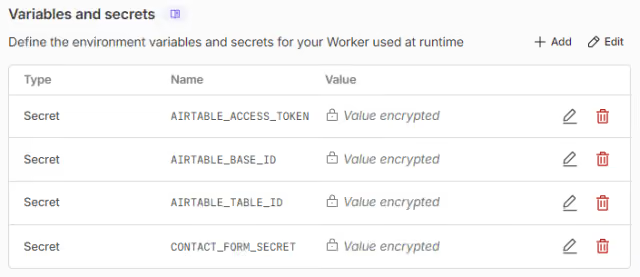
Settingstab, underVariables and secrets, define four new environment variables of typeText:AIRTABLE_ACCESS_TOKEN,AIRTABLE_BASE_ID, andAIRTABLE_TABLE_ID(using the values noted from Airtable), andCONTACT_FORM_SECRET(a random string used to sign the anti-spam nonce). Click theDeploybutton.
NOTE: The value for
CONTACT_FORM_SECRETshould be a random string that only the Worker knows. It is not tied to Airtable or any external service. It exists purely to sign and verify the nonce, so its only requirement is high entropy and secrecy. The commandopenssl rand -hex 32produces a 64-character random hex string or, ifopensslis not available, Node’scrypto.randomBytes(32).toString('hex')works equally well.
- From the dashboard, open the code editor.
- Replace the template code with the following code.
const encoder = new TextEncoder();
let hmacKey = null;

const CONTACT_BASE_URL = 'https://johndalesandro.com/contact/';
const NONCE_URL = `${CONTACT_BASE_URL}nonce/`;
const SUBMIT_URL = `${CONTACT_BASE_URL}submit/`;

async function getHmacKey(secret) {
  if (!hmacKey) {
    hmacKey = await crypto.subtle.importKey(
      'raw',
      encoder.encode(secret),
      { name: 'HMAC', hash: 'SHA-256' },
      false,
      ['sign', 'verify'],
    );
  }
  return hmacKey;
}

async function signPayload(secret, payload) {
  const key = await getHmacKey(secret);
  const signature = await crypto.subtle.sign('HMAC', key, encoder.encode(payload));
  return btoa(String.fromCharCode(...new Uint8Array(signature)));
}

async function issueNonce(env) {
  const timestamp = Date.now().toString();
  const signature = await signPayload(env.CONTACT_FORM_SECRET, timestamp);
  return `${timestamp}.${signature}`;
}

function base64ToBytes(base64) {
  return Uint8Array.from(atob(base64), (c) => c.charCodeAt(0));
}

async function verifyNonce(env, token) {
  if (!token || !token.includes('.')) {
    return null;
  }
  const [timestamp, signature] = token.split('.');

  let signatureBytes;
  try {
    signatureBytes = base64ToBytes(signature);
  } catch {
    return null;
  }

  const key = await getHmacKey(env.CONTACT_FORM_SECRET);
  const isValid = await crypto.subtle.verify(
    'HMAC',
    key,
    signatureBytes,
    encoder.encode(timestamp),
  );

  if (!isValid) {
    return null;
  }
  return Number(timestamp);
}

function formatDuration(ms) {
  const totalSeconds = Math.floor(ms / 1000);
  const minutes = Math.floor(totalSeconds / 60);
  const seconds = totalSeconds % 60;

  if (minutes === 0) {
    return `${seconds} second${seconds === 1 ? '' : 's'}`;
  }
  return `${minutes} minute${minutes === 1 ? '' : 's'} ${seconds} second${seconds === 1 ? '' : 's'}`;
}

function hasValidReferer(request) {
  const referer = request.headers.get('referer');
  if (!referer) {
    return false;
  }
  try {
    return new URL(referer).toString() === CONTACT_BASE_URL;
  } catch {
    return false;
  }
}

function failure(reason) {
  return new Response(`Message Failed: ${reason}`, { status: 200 });
}

async function createRecord(env, body) {
  return fetch(
    `https://api.airtable.com/v0/${env.AIRTABLE_BASE_ID}/${encodeURIComponent(env.AIRTABLE_TABLE_ID)}`,
    {
      method: 'POST',
      body: JSON.stringify(body),
      headers: {
        Authorization: `Bearer ${env.AIRTABLE_ACCESS_TOKEN}`,
        'Content-Type': 'application/json',
      },
    },
  );
}

export default {
  async fetch(request, env) {
    if (!hasValidReferer(request)) {
      return failure('Flagged As Spam (Invalid Referer)');
    }

    const requestURL = new URL(request.url);

    if (request.method === 'GET' && requestURL.toString() === NONCE_URL) {
      const nonce = await issueNonce(env);
      return new Response(nonce, { status: 200 });
    }

    if (request.method !== 'POST') {
      return failure('Method Not Allowed');
    }
    if (requestURL.toString() !== SUBMIT_URL) {
      return failure('Endpoint Not Found');
    }

    try {
      const body = await request.formData();
      const { name, email, subject, message, nonce, honeypot } = Object.fromEntries(body);

      if (honeypot) {
        return failure('Flagged As Spam (Honeypot)');
      }

      const trimmedName = name?.trim();
      const trimmedEmail = email?.trim();
      const trimmedSubject = subject?.trim();
      const trimmedMessage = message?.trim();

      if (!trimmedName || !trimmedEmail || !trimmedSubject || !trimmedMessage) {
        return failure('Invalid Input');
      }
      if (
        trimmedName.length > 200 ||
        trimmedEmail.length > 200 ||
        trimmedSubject.length > 200 ||
        trimmedMessage.length > 50000
      ) {
        return failure('Invalid Input');
      }
      if (!/^[^\s@]+@[^\s@]+\.[^\s@]+$/.test(trimmedEmail)) {
        return failure('Invalid Input');
      }

      const issuedAt = await verifyNonce(env, nonce);
      if (issuedAt === null) {
        return failure('Flagged As Spam (Invalid Nonce)');
      }

      const elapsedMs = Date.now() - issuedAt;
      if (elapsedMs < 5000) {
        return failure('Flagged As Spam (Timestamp Duration)');
      }
      if (elapsedMs > 3600000) {
        return failure('Flagged As Spam (Nonce Expired)');
      }

      const ip = request.headers.get('CF-Connecting-IP') ?? 'Unknown';

      const reqBody = {
        fields: {
          Name: trimmedName,
          Email: trimmedEmail,
          Subject: trimmedSubject,
          Message: trimmedMessage,
          IP: ip,
          Duration: formatDuration(elapsedMs),
        },
      };

      const response = await createRecord(env, reqBody);
      if (!response.ok) {
        const errorBody = await response.text();
        console.error(`Airtable Error: ${errorBody}`);
        return failure('Error Sending Message');
      }

      return new Response('Message Sent Successfully', { status: 200 });
    } catch (error) {
      console.error('Worker Error: ', error);
      return failure('Error Sending Message');
    }
  },
};
Before deploying, adjust CONTACT_BASE_URL to match the website’s contact page.
The Worker’s fetch() handler checks the referer on every request, then branches on method and path:
- A
GETrequest toNONCE_URL(/contact/nonce/) returns a freshly signed nonce viaissueNonce(). - A
POSTrequest toSUBMIT_URL(/contact/submit/) is validated and forwarded to Airtable. - Anything else is rejected.
Both paths must match the two routes defined in Domains & Routes above.
Click the Deploy button.
Results
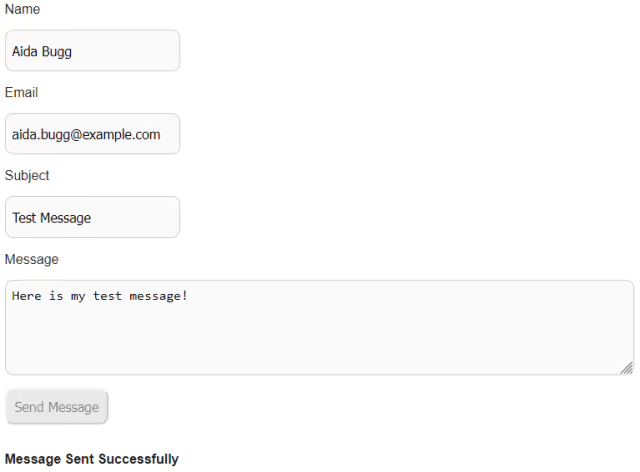
Test the form by submitting a message.
A confirmation response like Message Sent Successfully appears under the form.
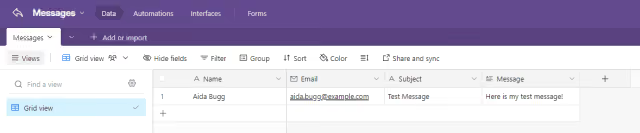
Check the Airtable base. A new record is created in the Messages table.
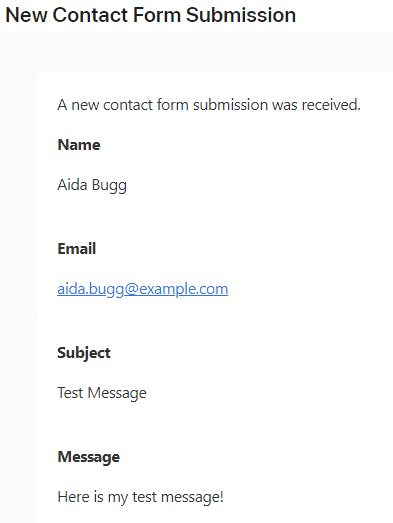
If automation is enabled, an e-mail notification with the submitted details will be received.
Summary
This article walks through building a free, serverless contact form for a static site using HTML, JavaScript, Cloudflare Workers, and Airtable. Layering several independent, lightweight checks provides meaningful protection against automated abuse without requiring a traditional backend, a CAPTCHA, or any end-user friction.