Converting Month Names to Numbers in Power Query
It is common to encounter datasets where month names are stored as text values like “January” or “JAN”. To perform meaningful time-based analysis, it is often necessary to convert these text representations into their corresponding month numbers (for example, January = 1, February = 2). Fortunately, there are several ways to accomplish this in Power Query, depending on data format, code readability, and reusability.
In this article, three different methods are demonstrated:
- Using an if-then-else statement.
- Using
Date.FromText. - Using a custom mapping function.
Instructions
For these examples, a table named TBL_SALES that contains employee sales data is used. The table structure includes columns for NAME, YEAR, and twelve columns for JAN through DEC.
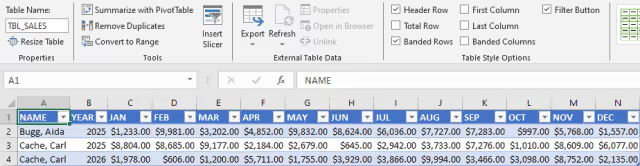
Each method will:
- Unpivot the table to create a
MONTH NAMEcolumn containing the valuesJANthroughDEC. - Convert these text-based month names to their numeric equivalents.
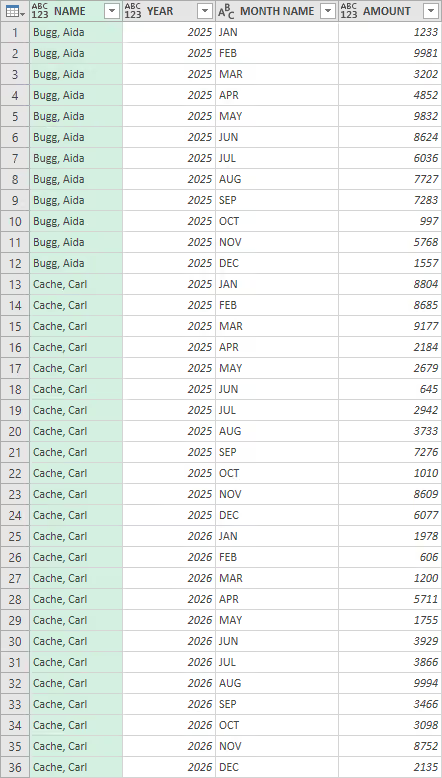
Method 1: Using If-Then-Else Statement
In this method, a long if-then-else statement is created to check each month name individually and return the corresponding month number. The comparison values must match the format of the underlying data.
- If the month names are full names like “January”, check for
January. - If they are abbreviations like “JAN”, check for
JAN. - If the data is based on a culture other than
en-US, the conditions may need to be adjusted.
let
  Source = Excel.CurrentWorkbook(){[Name = "TBL_SALES"]}[Content],
  #"Unpivoted Other Columns" = Table.UnpivotOtherColumns(
    Source,
    {"NAME", "YEAR"},
    "MONTH NAME",
    "AMOUNT"
  ),
  #"Added MONTH" = Table.AddColumn(
    #"Unpivoted Other Columns",
    "MONTH",
    each
      let
        Cleaned = Text.Trim(Text.Proper([MONTH NAME]))
      in
        if Cleaned = "Jan" then 1
        else if Cleaned = "Feb" then 2
        else if Cleaned = "Mar" then 3
        else if Cleaned = "Apr" then 4
        else if Cleaned = "May" then 5
        else if Cleaned = "Jun" then 6
        else if Cleaned = "Jul" then 7
        else if Cleaned = "Aug" then 8
        else if Cleaned = "Sep" then 9
        else if Cleaned = "Oct" then 10
        else if Cleaned = "Nov" then 11
        else if Cleaned = "Dec" then 12
        else null,
    Int64.Type
  ),
  #"Changed Type" = Table.TransformColumnTypes(
    #"Added MONTH",
    {{"NAME", type text}, {"YEAR", Int64.Type}, {"AMOUNT", Currency.Type}}
  ),
  #"Reordered Columns" = Table.ReorderColumns(
    #"Changed Type",
    {"NAME", "YEAR", "MONTH NAME", "MONTH", "AMOUNT"}
  )
in
  #"Reordered Columns"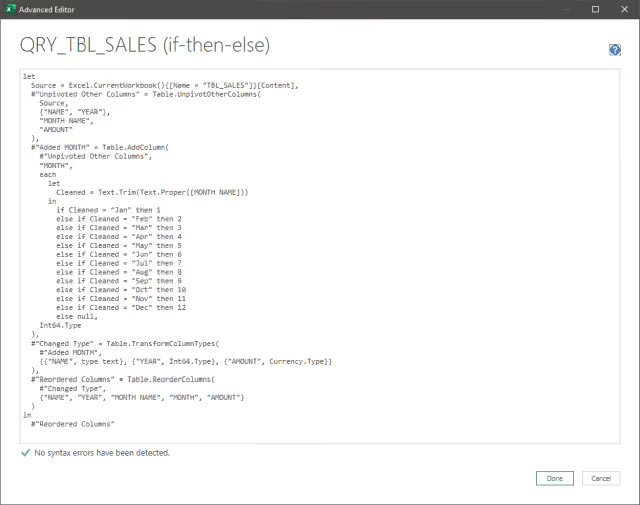
Method 2: Using Date.FromText
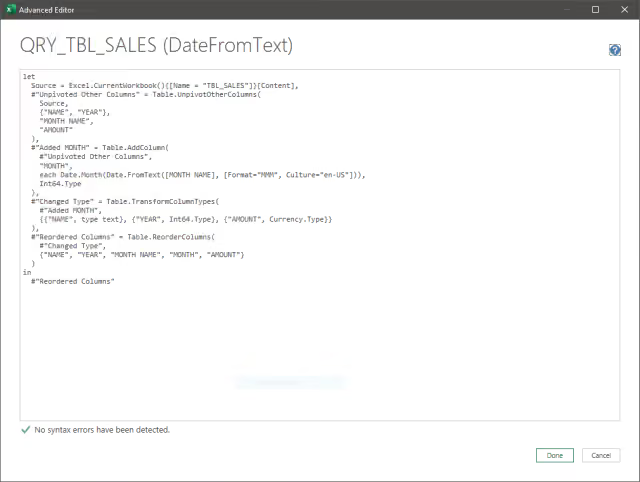
This method uses Date.FromText with a specified Format and Culture to convert the month name into a date value. Then, Date.Month is used to extract the numeric month.
Key points:
- If the data contains full month names like “January”, use
Format = "MMMM". - If the data contains abbreviations like “JAN”, use
Format = "MMM". - If the culture is not
en-US, specify the correctCultureparameter.
let
  Source = Excel.CurrentWorkbook(){[Name = "TBL_SALES"]}[Content],
  #"Unpivoted Other Columns" = Table.UnpivotOtherColumns(
    Source,
    {"NAME", "YEAR"},
    "MONTH NAME",
    "AMOUNT"
  ),
  #"Added MONTH" = Table.AddColumn(
    #"Unpivoted Other Columns",
    "MONTH",
    each Date.Month(Date.FromText([MONTH NAME], [Format="MMM", Culture="en-US"])),
    Int64.Type
  ),
  #"Changed Type" = Table.TransformColumnTypes(
    #"Added MONTH",
    {{"NAME", type text}, {"YEAR", Int64.Type}, {"AMOUNT", Currency.Type}}
  ),
  #"Reordered Columns" = Table.ReorderColumns(
    #"Changed Type",
    {"NAME", "YEAR", "MONTH NAME", "MONTH", "AMOUNT"}
  )
in
  #"Reordered Columns"
NOTE:
Date.FromTextmatches month abbreviations case-insensitively, so no explicit cleanup is needed here.
Method 3: Custom Function Using Mapping Technique
In this method, a custom function is defined that maps month names to their corresponding numbers. The function includes basic text normalization to make it more resilient. It can handle both full month names (for example, “January”), and abbreviations (for example, “JAN”).
Unlike Date.FromText, this approach can easily be extended to support custom abbreviations or alternate naming conventions.
First, define the GetMonthNumber function:
let
  GetMonthNumber = (monthName as text) as nullable number =>
    let
      MonthMapping = [
        January   = 1,
        February  = 2,
        March     = 3,
        April     = 4,
        May       = 5,
        June      = 6,
        July      = 7,
        August    = 8,
        September = 9,
        October   = 10,
        November  = 11,
        December  = 12
      ],
      Cleaned = Text.Trim(Text.Proper(monthName)),
      MatchedMonth = List.First(
        List.Select(Record.FieldNames(MonthMapping), each Text.StartsWith(_, Cleaned)),
        null
      ),
      MonthNumber = if MatchedMonth <> null then Record.Field(MonthMapping, MatchedMonth) else null
    in
      MonthNumber
in
  GetMonthNumber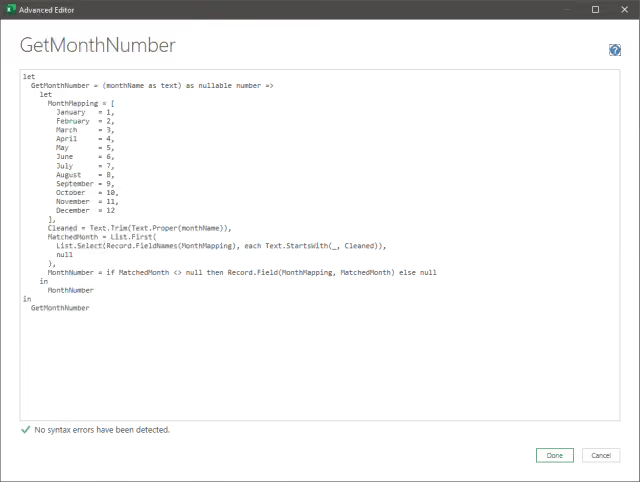
Then, use it inside the main query:
let
  Source = Excel.CurrentWorkbook(){[Name = "TBL_SALES"]}[Content],
  #"Unpivoted Other Columns" = Table.UnpivotOtherColumns(
    Source,
    {"NAME", "YEAR"},
    "MONTH NAME",
    "AMOUNT"
  ),
  #"Added MONTH" = Table.AddColumn(
    #"Unpivoted Other Columns",
    "MONTH",
    each GetMonthNumber([MONTH NAME]),
    Int64.Type
  ),
  #"Changed Type" = Table.TransformColumnTypes(
    #"Added MONTH",
    {{"NAME", type text}, {"YEAR", Int64.Type}, {"AMOUNT", Currency.Type}}
  ),
  #"Reordered Columns" = Table.ReorderColumns(
    #"Changed Type",
    {"NAME", "YEAR", "MONTH NAME", "MONTH", "AMOUNT"}
  )
in
  #"Reordered Columns"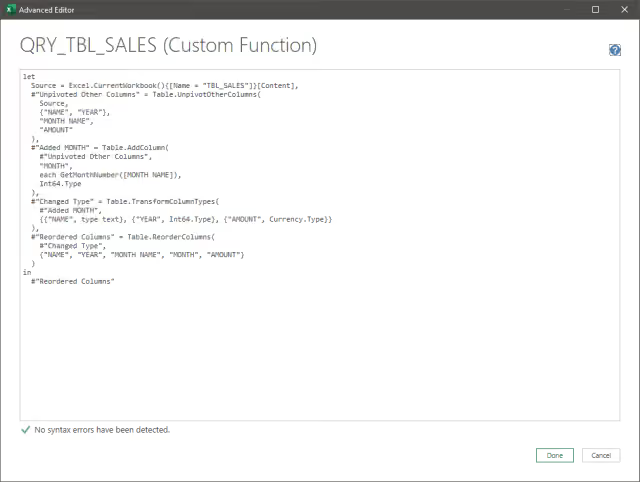
Results
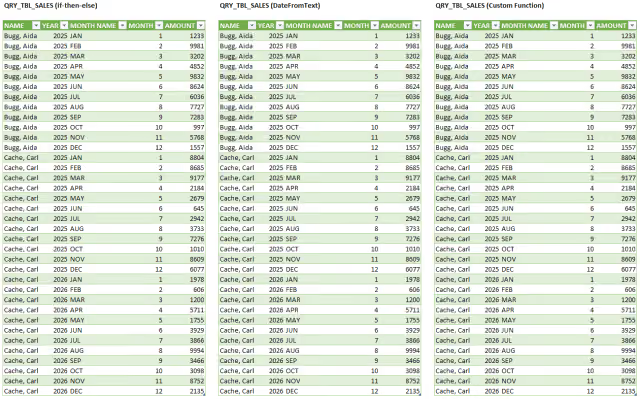
Regardless of the method, all three approaches successfully convert month names into their numeric equivalents, ready for analysis or further processing.
Summary
Each method provides a reliable way to convert month names to numbers, depending on the project needs. The if-then-else approach is simple but tedious, Date.FromText is clean but format-sensitive, and the custom mapping function is flexible and reusable. Choose the method that best balances simplicity, maintainability, and flexibility.